
DIY Suncatcher Bookmark with Tissue Paper and... Packing Tape?
- May 11
- 8 min read
Updated: May 18

Break out your Packing Tape y'all!
Y'all know how much I love a sneak attack art supply.
This easy kids' craft uses two of my favorite art supplies that are already hiding in many creative family homes:
Tissue paper
Clear packing tape
That's right! With a little tissue paper and packing tape, kids can make a beautiful suncatcher bookmark that is colorful, durable, and a wonderful gift. Grandparents LOVE these babies!
The best part? This packing tape bookmark is simple enough for preschoolers to help make, but challenging enough for older kids to build real creative skills.
Along the way, artists get to:
Tear and arrange tissue paper
Use a tape dispenser
Cut a hole with scissors
Thread ribbon or a pipe cleaner
Practice critical thinking and problem solving
If you're ready to dive into this project, click below:
If however, you’re curious about all the deep learning this simple project can deliver, read on!
This Packing Tape Bookmark Craft Is Full of Big Learning
For the curious at heart, here are some of the learning outcomes artists can get from this tissue paper art project. I make these a lot and I even find that they are a wonderful way to improve my skills!
Learning Outcomes for This Packing Tape Craft
Fine motor skills
Creative Flexibility and problem solving
Basic color theory skills
Mastering art supplies
Using a tape dispenser
Using scissors to cut a hole
Twisting wire or tying ribbon
There are quite a few tricky elements to this project! I work with my students for years to master many of these skills. Making sure the tape doesn’t fold, pulling it cleanly out of a dispenser or even learning how to hand cut a hole, are all important foundational skills for any young creative.
Before we break out our art supplies and packing tape, let’s take a moment to hone the most important creative skill of all:
CRITICAL THINKING!
Thinking Critically About our Sun Catcher Bookmarks
It’s so important to teach kids how to analyze art projects. It gives them the skills and insights they need, not just to copy cool project ideas, but go onto make their own original projects. After all, the goal of quality arts education is not to show kids how to make pretty bookmarks. It’s how to be powerful and original creators!
Art Supplies & Substitutes
Sometimes when we want to make an art project, we don’t always have the supplies we need. This does not need to end a project! If we develop the ability to understand our art supplies we can send in a substitute.
For example, in this bookmark project we use a pipe cleaner (aka chenille stem).
But if you don’t have a chenille stem on hand, there are plenty of other things you can use!
To figure out what we might use as a substitute, we can ask the following questions:
What purpose does this art supply serve?
The chenille stem is the ribbon that makes the bookmark look pretty inside of the book
It is also something that readers can grab to help them quickly get to their page.
What does the art supply DO in this project?
It is inserted through an opening and sticks out the top of the bookmark.
Based on those answers, what qualities must the art supply have?
I must be able to secure it to the bookmark so it doesn’t slip out.
It must be thin enough to fit through the hole in the bookmark.
It must be durable to being tugged on.
It must be able to stick up or fall down over the book without being too bulky.
It must be pleasant to touch (nothing sharp or sticky)
What other art supplies do I have on hand that could substitute?
Ribbon
Yarn
String
Small gauge wire with the ends folded back so it’s not pokey.
This is also where sneak attack art supplies shine!
Maybe you have:
A leftover shoelace
Twine from a bouquet of flowers
A bright twist tie
A strip of fabric
None of these things are strictly considered “art supplies”, but when we understand what work needs to be done, we can get creative about what tools we use.
Construction
This is where young artists can look at how a project is put together. Understanding construction is a vital skill because with it, we can move on to create our original projects.
I find that actually doing the project once by following instructions is the best way to learn how it is put together. Looking at detailed pictures or someone else’s finished project is also a great way to start figuring out a project’s construction.
When children understand how something is built, they can:
Repair it
Modify it
Improve it
Invent entirely new designs
Thinking critically about art supplies and construction helps children become even more creative!
PROJECT INSTRUCTIONS:
How to make our Suncatcher Bookmark
Supplies for a Packing Tape Bookmark
Clear packing tape (about 12 inches total)
Tissue paper in various colors
Other colorful paper scraps from your Lil Bits Scrap Jar
Chenille stem (pipe cleaner), ribbon, yarn, or string
Scissors
A pencil or pen

Step by Step Instructions for kids to make a Suncatcher Bookmark
Step 1: Gather Your Supplies
Make sure you have everything you need.
If you're missing something, think critically about what that supply does and choose a substitute.
Helping Younger Artists
It can be helpful to keep supplies out of arm's reach until they are needed.

Step 2: Tear tissue paper into small pieces
This is the fun part of our project and great for all ages. Simply tear up your pieces of paper until they are fairly small.
This is a great moment to look into your Lil Bit Scrap Jar to see what other inspiring pieces of paper you have around!
Helping Younger Artists:
Using tissue paper is a great way to help preschoolers and younger practice the mechanics of tearing. Since the paper is so light, it rips easily! If you like, you can use a spray bottle to lightly spritz the paper. This will make it come apart more easily.

Step 3: Arrange torn paper
Visualize roughly how large the bookmark will be. Then arrange pieces of paper on the table in that size. Try layering different colors of tissue paper in interesting ways. You can also add variation with the size of paper.
I added some colorful paper towels as well, and other treasures from my Lil Bits Scrap Jar!
Helping Younger Artists:
As artists arrange their paper, use describing words to talk about their choices.
“That is a pretty blue!”
“This piece is so tiny and adorable.”

Step 4: Press tape onto torn paper
Pull out a piece of packing tape that’s about 1-2 inches longer on either end than the pile of paper you have arranged on the table. It’s good for the tape to touch itself on either side so the bookmark does not fall apart.
Hold the tape firmly on either end, then press it down on the paper. Use your hand to smooth it out.
Helping Younger Artists:
Tape is quite tricky for younger kids, so I would recommend that an adult or older child do this part. Younger artists can help by smoothing down the tape, saying “when”, and cutting the tape with scissors.

Step 5: Flip and add more paper
Flip over your bookmark and see if you want to add more fun scraps of tissue paper before sealing everything up.
This is also the moment to personalize your bookmark. Consider adding their name and the year to a piece of paper that you add on the back. I love looking at bookmarks my kids made and being able to see how old they were!
Helping Younger Artists:
Encourage artists to find a few pieces they like!

Step 6: Press tape onto backside of bookmark
Repeat attaching another piece of tape. This time, also try to line the tape up with the other piece of tape you have already attached, but perfection is not necessary.


Step 7: Trim tissue paper fringes off of bookmark
Now it’s time to trim!
First, trim off the pieces of tissue paper that are hanging out of your packing tape.
Next, trim the tape itself if there are spots that stick out more than you like.
Don’t forget to do all 4 sides (top, bottom, left and right)!
Helping Younger Artists:
Trimming is a fun thing little artists can help with. You can also ask them, “where should we trim?”

Step 8: Seal edges with more tape
Wrap a piece of tape around any edges where the packing tape is not making a seal around the tissue paper. These spots are where the bookmark might peel apart.
Helping Younger Artists:
Ask younger artists to help identify spots where more tape is needed.

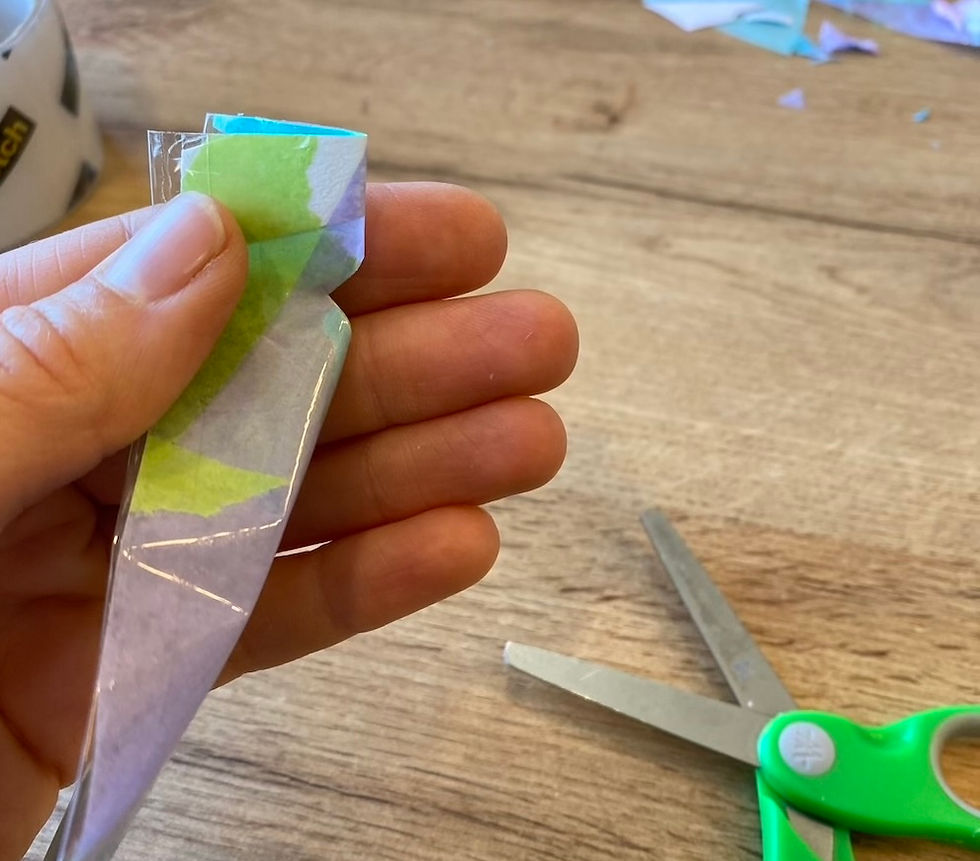
Step 9: Cut diamond hole for ribbon with scissors
Fold the top of the bookmark in half.
Cut a small triangle along the fold.
When opened, it will form a diamond-shaped hole!
Remember that we want the ribbon to fit in here snugly. The diamond should not be too small or large. It also should be about ¼-½ inch from the top so the ribbon does not tear out of the top of the bookmark.
When you open the bookmark, there should be a nice sized diamond!
Helping Younger Artists:
Children can make the cut while an adult holds the bookmark.
Help kiddos practice their shapes by asking, "What shape did we just make?"

Step 10: Add and secure ribbon material
Finally, insert your chenille stem or ribbon substitute into the diamond hole.
Secure it snugly by twisting or tying it. Make sure it’s not so snug that it puts pressure on the top of the bookmark.
Helping Younger Artists:
This is a great opportunity to practice fine motor skills! Chenille stems are great for toddlers and preschoolers to practice “threading a needle” (or putting a small object into a hole). Twisting and knots are also great skills to practice!

Step 11: Curl or embellish your ribbon
With my chenille stem, I twisted the ends around a pen a few times to twist the ends.
I love how these curls look peeking out of my books. Oooh, don’t they remind you of an insect? What other projects might that inspire?!
If you are using yarn or string for the ribbon, consider gluing colorful paper shapes onto the ends, knotting on paper beads, or tying a pattern of decorative knots.

Step 12: Admire your Beautiful work!
Wow, we did it! Congrats on making this beautiful, super useful art supply. Who should we gift it to?

Optional Next Step: Make your Own Original Design!
Copying the work of other artists (like me!) is a wonderful way to get inspired and pick up new skills. But as your artsy friend, I am excited to see what YOU will create next!
Now that you have created a Sun Catcher bookmark, you can make something brand new of your own design.
Let’s take a second to think critically about the project we just did, and ask ourselves some helpful questions.
What were the Variables of the Packing Tape Bookmark?
This means, what can we easily change as we experiment with new designs?
Shape
Size
Color
Purpose
Elements
Packing Tape
Tissue Paper
Cenille Stem
Variations
Now that we have thought through what VARIABLES we have to play with, what VARIATIONS can we make?
Here are just some ideas to get the juices flowing:
A Suncatcher BUTTERFLY bookmark
A tissue paper collage bookmark
A Suncatcher circle to hang in a window
A suncatcher placemat
I can’t wait to see what you make next!

Like this creative bookmark project?
Browse all of my Tissue Paper Art Projects for Kids!
Suncatcher Bookmark FAQ's
What is a packing tape bookmark?
A packing tape bookmark is a simple kids craft made by sealing tissue paper and other colorful scraps between two pieces of clear packing tape.
Can preschoolers make a packing tape bookmark?
Yes! Preschoolers can tear tissue paper and arrange colors for a packing tape bookmark while adults help with scissors and tape.
What can I use instead of a pipe cleaner for this packing tape bookmark?
Ribbon, yarn, string, twine, and even a colorful shoelace all work beautifully in this packing tape bookmark craft.
Is a packing tape bookmark a good handmade gift for kids to make?
Absolutely. A packing tape bookmark is colorful, durable, and useful, making it a thoughtful handmade gift for grandparents, teachers, and book lovers.
Can I use other materials besides tissue paper in this packing tape bookmark?
Yes! Try wrapping paper, paper towels, magazine clippings, and small treasures from your Lil Bits Scrap Jar.
How long does a packing tape bookmark last?
A well-made packing tape bookmark is surprisingly durable and can last for years with regular use in favorite books.

Comments