
How to Organize Kids' Artwork without Tears or Stress
- Dec 14, 2025
- 9 min read
Updated: Dec 18, 2025

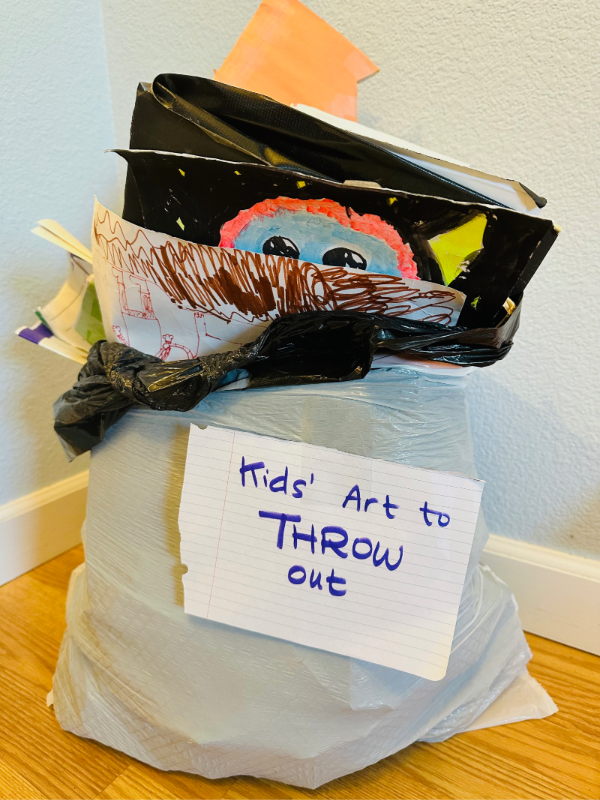
Great News: It's OK to Throw Out Kids' Artwork
When it comes to making art with kids, I hear a lot of parents stressing out about one thing:
How to organize their kids' artwork.
Specifically, guilt about THROWING IT AWAY.
Well, I'm here to spread some very good news.
It's OK to throw away your kids’ artwork.
Yes, I am totally for real about this. I'm a professional children's book illustrator, an arts educator AND a mom of 3. I can say from the bottom of my artsy lil heart that the part of you that is ACHING to cut down that pile of old artwork is valid and on the right track.
When families organize kids' artwork- including throwing much of it away- you are helping your kids become stronger artists AND making your home healthier and happier.
Let me show you WHY this is true and HOW to finally tackle that crazy, colorful mess. This very easy-to-complete, easy-to-repeat system will help you spend LESS time feeling tortured by your kids' creative spirits and MORE time celebrating them.
Let's go!
Yes, Purging Your Kids' Artwork Makes Them Stronger Creatives
As a professional artist, I am CONSTANTLY throwing old stuff away, organizing what's left, and making space for what's to come. This is a MASSIVE part of the creative process that everyone must grapple with.
Your young creative is no exception to this. When we organize kids' artwork we help them learn how to:
LET GO of what they've tried
Reflect on what WORKS and what doesn't
Reflect on what has MEANING for them
Make space for what's NEXT
If you have ever stressed about throwing out your kids' artwork, I invite you now to let that go. You are beginning them on a lifelong journey of managing their creative lives.
It is important, however to help your kids feel ownership over this process. This is not as hard as it might sound. Throughout this post I will point out how you can use display, easy conversations and TIME to help kids feel like their creative spirit is celebrated in your home.
How to Organize Kids' Artwork: step-by-step
There are 2 big moments when artwork needs to be organized:
when it comes home
the big once-a-year purge
We will go into both here.
First...
Designate a place to temporarily STORE and to DISPLAY artwork
First thing is first. You need a few spots to stash all the artsy goodness your kiddos create so that when it's time to do the big organize, it's all easy to find. Make sure you have:
An Artwork Slush Pile:
This is where you chuck artwork that comes home. Make sure it's large enough for 12"x18" art. This can be:
a plastic storage tub
an attractive decorative box
a repurposed shipping box
just a pile of artwork stashed under a bookcase or in a corner. (MY GO-TO!)
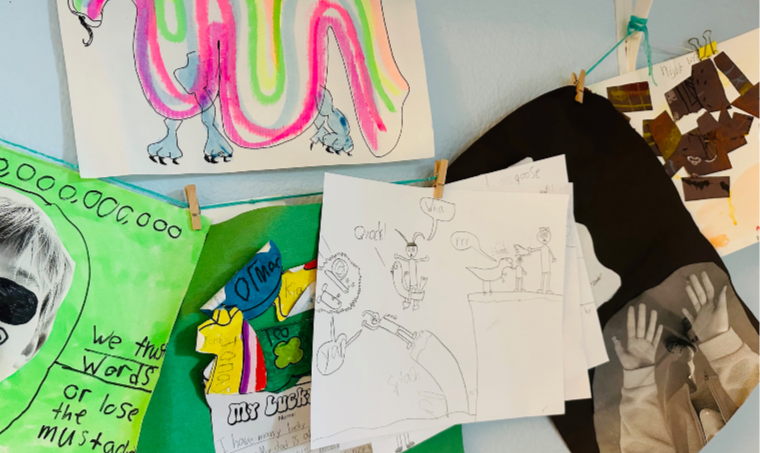
A Spot to Easily Display Artwork:
This is an easy place where you can pop up any artwork you love, your kid is proud of, or is too large to go into the slush pile. Examples include:
an Art Line (MY FAVORITE!)
magnetic frames for storing artwork
bulletin board
the fridge
scotch tape on the wall (MY SECOND FAVORITE!)
Let me quickly share the magic of an ART LINE. This thing is super basic, but I swear by it. It is literally a string hung up with a thumbtacks on either side, and a bunch of clips holding artwork up. Binder clips and clothespins work great.
Will you see an art line in a Pottery Barn photo shoot? No ma'am. But it WORKS like a charm and you can put it up in about 4 minutes.
(Yes, I proudly prioritize ease and my kids' creativity over having a showcase home.)
When Art Comes Home I do this:
Compliment my kid on their work and maybe chat about it for a few minutes.
Ask them, "Would you like to keep this?" If they say:
"YES!" I put it in the slush pile or put it on display.
"MAYBE" or "I don't know" or just seem unsure, I also put it in the slush pile or on display. We can decide later!
"NOPE" it goes right in the trash.
Let's Talk About Your #1 Ally in Organizing Artwork... TIME
If your kid is anything like my kids- or ME for that matter- the moment they are most attached to an artwork is right after they've made it.
It's really rough to expect a kid to decide whether to keep or get rid of an artwork an hour or even a week after they poured their time and heart into it.
So let time be your friend in this process. Use tools like the slush pile and temporary display to give kids time to move on. Our kids are only young once. When they are grown and moved away, you will be so grateful that you have these gorgeous, irreplaceable creations from their childhood.

The Big Purge: Organizing your kids' artwork once a year
Gather Your Supplies
First, clear a big space to work like a dining room table or the floor. Also grab:
a big trash bag
some paper
a marker
a sharpened pencil
a higher quality container for all the artwork you choose to keep
Make your Labels
With your marker and paper, make 4 large labels. Make sure they are BIG so they don't get lost in the chaos of all the art. I used 1/2 a piece of paper for each. Label them:
Throw Out
Think About
Keep (store)
Frame (or display)
Personally, I do not ask my kids to join me. I have asked them throughout the year about all of their work and, for the most part, I know what they love. For the 2-3 pieces I'm genuinely unsure of, I can keep them aside to ask about later.
Now it's time to start sorting!

I'll share with you next how I think through which artwork goes into which pile.
What Kids' Artwork do I Throw Out?
Anything very damaged
Exercises or technique pieces that are not compelling. These are like practicing throwing a baseball. The exercise is the point, not the artwork.
Anything that feels curated by a teacher and lacks my kids' spirit or personality.
Pieces of paper that have just been scribbled on or half used.
All of this goes straight into the trash. The only exception to "scribbles" is work from when my kids were very little and all they were capable of were scribbles. Some of those pages are full of emerging skills! These are some of the most precious pieces in our family's collection.

What goes in the Think About pile?
This pile is your SECRET WEAPON. When organizing like this, the #1 goal is to FINISH. Movement is your friend. If you find a piece you are unsure about, just throw it in the Think About pile. There's no reason to get paralyzed by a hard choice, and you will come back to it soon.

What Kids' Artwork Do I Keep?
Ok, here we are going to review ALL of the artwork I keep. Then I'll discuss what I DISPLAY and what I STORE.
Keep the kids' artwork that:
Has strong sentimental value for you or your child.
Shows an exciting developmental leap, like drawing a house for the first time or color mixing successfully.
Just oozes your kids' individual personality. I love funny or emotional pieces.
Is artistically compelling.
Would look AWESOME hanging up.
DISPLAY (by framing)
Those pieces you think will look AWESOME on display in your home.
Pieces that your child or you are very proud of and you want to share with visitors.
Pieces that are special enough you are willing to pay $25-$200 to permanently display them.
In general, I do not permanently display artwork that doesn't match the design or colors of my home. My house is pretty child-friendly so kids' art looks great on my walls, but some color palettes clash. I want the art I hang up to ADD to my home, not compete with it.
STORE
All the other artwork you would like to keep! You can use:
plastic tubs
decorative boxes
rigid art portfolios that you store lying flat
BUDGET VERSION: 2 large pieces of archival mat board taped together. Artwork won't yellow in here because it's acid-free.
If you like, you can also display some of these up on your artline or temporary display.


Last Steps to Organizing your Kids' Artwork
Woohoo, the hard part is done! Here are a last few things to do before you are totally done:
Go back through the "Think About" pile. Anything you still aren't sure of, just keep. If it doesn't stand the test of time you can chuck it out next year.
Write your kids' name on any artwork that isn't yet tagged, along with the year. Use pencil and write on the back of the artwork.
Set aside your "framers" to put up soon.
Store your "keepers".
Take out the trash!

Organizing Kids' Artwork Makes Way for MORE Creativity
Whooo, you did it!
I hope you found this process easy-to-follow and even a little bit enjoyable. Maybe I'm a weirdo, but I absolutely LOVE sifting through my kids' old artwork. The fact that I prune our collection regularly means that every time I dig into the pile, I'm confronted with memories and pride instead of guilt and overwhelm.
The fact is, when we organize our kids' artwork we are caring for our kids' home AND their creative process at the same time.
We can all celebrate where we have been AND make room for whatever adventures are coming our way.
Happy creating, families!
If you loved this post about Kids' Art at Home, you might also like:

FAQ's about organizing kids' artwork at home
How do you organize kids’ artwork without feeling guilty?
Organizing kids’ artwork without guilt starts with understanding that throwing out kids’ artwork is part of the creative process. Artists of all ages need to let go of old work to make space for new ideas. By using temporary storage, simple display methods, and a once-a-year organizing routine, you can honor your child’s creativity while keeping your home manageable.
Is it OK to throw out kids’ artwork?
Yes, it is absolutely OK to throw out kids’ artwork. In fact, learning to let go of old work helps kids develop reflection, resilience, and creative confidence. Not every piece needs to be saved forever. Keeping only the most meaningful artwork helps families celebrate creativity without being overwhelmed by clutter.
What is the best way to organize kids’ artwork throughout the year?
The easiest way to organize kids’ artwork throughout the year is to use a three-option system: display it, stash it, or toss it.
When artwork comes home, either hang it on a simple art line, place it into a temporary “slush pile,” or throw it out if your child isn’t attached to it. This prevents daily decision fatigue and makes organizing kids’ artwork once a year much easier.
How much kids’ artwork should I keep each year?
Most families only need to keep one or two pieces of kids’ artwork per child per year. Some years- like when a child has a great art teacher or hits a developmental leap- you might keep four to six pieces.
Letting go of the rest helps keep storage manageable and ensures that the artwork you do save feels meaningful rather than overwhelming.
What should I do with kids’ artwork I’m unsure about?
If you’re unsure whether to keep or throw out kids’ artwork, create a “Think About” pile. This pile allows you to keep moving during the organizing process without getting stuck on emotional decisions.
Often, time makes the choice obvious. When you revisit the pile months later, it’s much easier to see which pieces truly matter and which can be let go.
What is the easiest way to display kids’ artwork at home?
One of the easiest ways to display kids’ artwork is with an art line — a simple string hung on the wall with clips or clothespins. Art lines are low-effort, temporary, and flexible, making them perfect for celebrating creativity without committing to permanent display.
This approach works especially well for families who want to encourage creativity while keeping visual clutter under control.


Comments